
Use pixel-anchored screenshots as your default for precise, scannable feedback. Add a short, narrated screen recording when you need to show motion, walk through a multi-step process, or deliver feedback that benefits from a personal, conversational tone.
Three quick rules to guide the decision:
- Precision over process? Screenshot with pinned annotations. A layout misalignment, a color error, or a broken button needs a coordinate, not a narration.
- Motion or reasoning involved? Short video. Hover states, animation timing, and complex logic are nearly impossible to explain clearly with a static image.
- Large class or high-volume QA? Screenshot first. Video scales poorly when you are reviewing 40 assignments or 200 bug reports in a single sprint.
Decision one-liner: If you can point to it, screenshot it. If you need to show it moving or explain your thinking out loud, record it.
Pro Tip: Keep recordings short to preserve the referenceability advantage and ensure they supplement rather than compete with documentation. Anything longer loses the referenceability advantage and starts competing with documentation rather than supplementing it.
Key Takeaways
Screenshots are the right default for most feedback workflows; add short, narrated video only when motion, process transparency, or personal tone genuinely requires it.
| Point | Details |
|---|---|
| Default to screenshots | Use pixel-anchored screenshots for precision, speed, and searchability in most review scenarios. |
| Add video selectively | Record a 60–180 second clip only when motion, multi-step processes, or relational tone cannot be conveyed in text. |
| Pair with structure | Video feedback works best alongside a rubric or written summary; without explicit goals, learners often miss the key point. |
| Plan for accessibility | Every video needs captions or a transcript; every screenshot needs descriptive alt text for inclusive, compliant feedback. |
| Usepinhub for pixel anchoring | Usepinhub's pixel-anchored comments, guest reviewer access, and AI summaries support the screenshot-first workflow recommended here. |
Table of Contents
- How do screenshot and video feedback compare across key dimensions?
- When should you use screenshots vs video for real-world scenarios?
- What does video feedback do better than screenshots?
- What does screenshot feedback do better than video?
- How do you create effective screenshot and video feedback?
- Accessibility, privacy, and consent: what you need to check
- How do you build a scalable workflow combining both formats?
- What does the research say about video vs screenshot feedback?
- A practitioner perspective on mixed feedback workflows
- Usepinhub brings pixel-anchored feedback and video integration together
- Sources
- FAQ
How do screenshot and video feedback compare across key dimensions?
The table below maps each format against the dimensions that matter most when you are choosing between them.
| Dimension | Screenshot | Video |
|---|---|---|
| Engagement / personalization | Moderate; relies on written tone | High; voice and pacing carry warmth |
| Precision / pixel anchoring | Excellent; comments tied to exact coordinates | Limited; requires timestamp or transcript |
| Time to create per item | Fast (30–90 seconds) | Slower (2–10 minutes with setup) |
| Reusability / searchability | High; text is indexable and scannable | Low without transcript or structured metadata |
| Bandwidth / file size | Very low | High; requires hosting or compression |
| Privacy / consent risk | Low; no voice or face captured | Higher; voice, face, and screen content recorded |
| LMS / ticketing integration | Broad; most tools accept images | Growing; Canvas added screen capture to SpeedGrader in 2025 |
| Scalability for large teams | Excellent | Moderate; production time compounds |
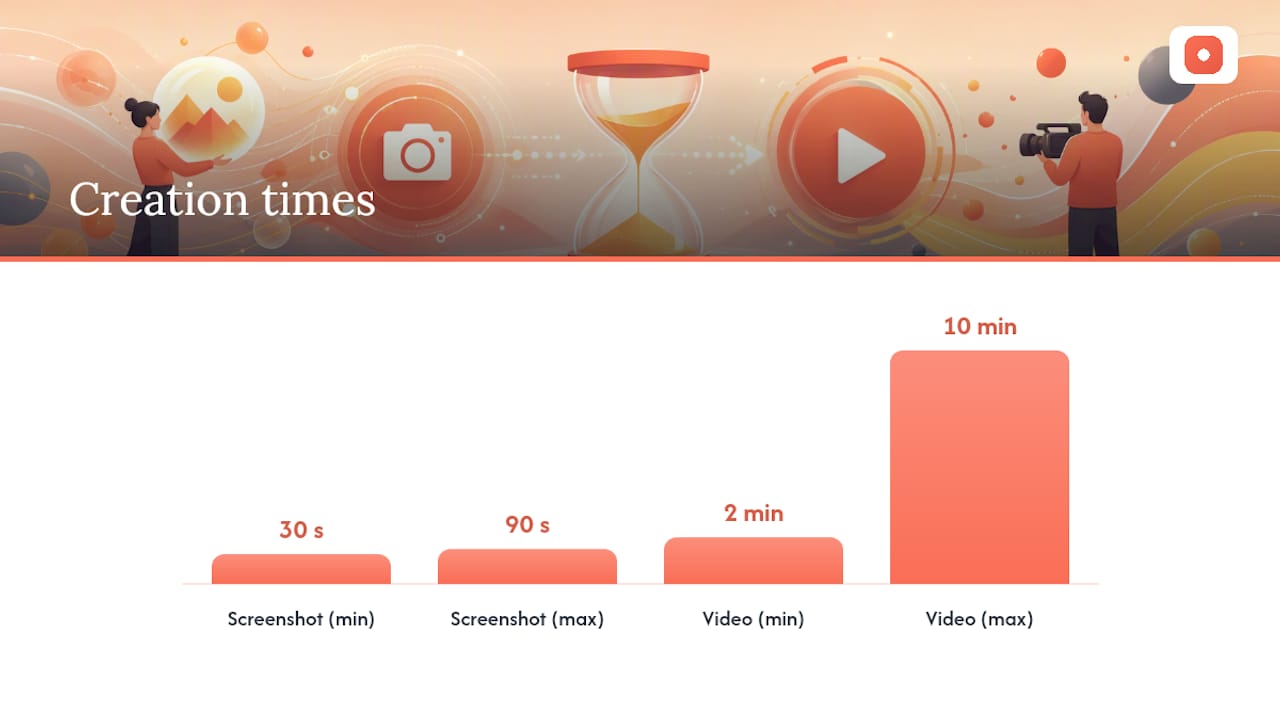
The single biggest trade-off: screenshots give you precision and maintainability at the cost of warmth and process transparency. Video gives you warmth and process transparency at the cost of production time and scannability. Documentation teams report updating screenshots 5–7x more frequently than equivalent video guides, which tells you something concrete about long-term maintenance burden.
A quick example of how that plays out in practice: reporting a layout bug calls for a screenshot with a pinned comment at the exact pixel. Demonstrating a timed hover interaction that only appears after a 400ms delay calls for a screen recording.
When should you use screenshots vs video for real-world scenarios?
Grading written assignments and design submissions
For written work, annotated screenshots are almost always the right call. You can highlight a specific sentence, pin a comment to a paragraph, and the student can scan your notes in 30 seconds. For a class of 35, that speed matters. Use video only when the assignment involves a process you want to model explicitly, such as showing how you would restructure an argument or walk through a rubric decision.
Reporting a UI bug
Screenshot with annotation. Attach the browser, OS, and viewport size in the comment thread. If the bug only appears during a specific interaction sequence, add a short recording alongside the screenshot. Screen recordings capture motion and multi-step problems that screenshots cannot, but a recording alone without a pinned anchor leaves developers guessing about the exact element.
Design reviews and stakeholder walkthroughs
For async design reviews, screenshots with pixel-anchored comments handle most feedback efficiently. For a stakeholder who needs to understand the rationale behind a layout decision, a 90-second narrated walkthrough of the design file better communicates intent than a list of text notes. Consider onboarding new clients with a short video overview, then switching to screenshot-based feedback for all subsequent revision rounds.
QA pipelines at scale
Screenshot-first. Assign video only to bugs that involve timing, animation, or multi-step reproduction steps. A QA team running 200 tickets per sprint cannot afford to record, host, and watch videos for every issue.
When to convert: If you wrote more than four sentences trying to describe something in a screenshot comment, that is a signal to record a 60-second clip instead. If your video is mostly pointing at a static element, trim it to a screenshot.
What does video feedback do better than screenshots?
Video excels at communicating motion, reasoning, and relational cues that text and static images cannot carry. When an instructor reads a student's draft and narrates their thinking out loud, the student hears not just what to fix but how an expert reader processes the text. That process transparency is the core advantage.
A Frontiers in Education study drawing on 77 course evaluations found that multimodal video feedback, combining screencast with narration, helped learners reconstruct the feedback-giver's reasoning and reduced the "translation problems" common with written-only comments. Students were less likely to misread tone or misinterpret intent.
Edutopia's practitioner reporting reinforces this: screencasts work best as a supplement to written comments, not a replacement. The video handles tone and reasoning; the text handles the precise, referenceable record.
Pro Tip: Pair every video with a short written summary or rubric reference. Research consistently shows that video feedback lands better when learners have explicit goals to anchor what they are watching.
The limits are real. A 4-minute video takes 4 minutes to watch, cannot be skimmed, and requires captions to be accessible. Production time per item runs 2–10 minutes once you factor in setup, recording, and upload. For high-volume workflows, those costs add up fast.
What does screenshot feedback do better than video?
Screenshots are the right default for precision, scannability, and any workflow where feedback needs to be referenced, updated, or searched later.
The core advantages:
- Pixel-level anchoring. A comment pinned to exact coordinates removes all ambiguity about which element you mean. No timestamp hunting, no "around the 2:15 mark."
- Fast capture. A screenshot with an annotation takes 30–90 seconds. A video of equivalent specificity takes several minutes to record and process.
- Searchable and indexable. Text comments attached to screenshots are findable in any search. Video content is opaque without a transcript.
- Easier to update. When a design changes, you replace one image. Updating a video means re-recording the entire segment.
- Low bandwidth. Screenshots work in any environment. Video requires reliable upload speeds and hosting infrastructure.
Here is how a typical pixel-anchored review works in practice:
- A designer uploads a mockup to a visual feedback tool.
- A reviewer clicks directly on the element in question and types a comment at that exact location.
- The comment thread stays anchored to that pixel, even across version updates.
- The designer resolves the thread as a checklist item once the fix is applied.
- The next version uploads alongside the original, so anyone can compare changes without re-reading a long email chain.
That workflow handles the majority of design QA, bug reporting, and assignment grading without a single video file. For a deeper look at how this applies to web design feedback, the approach scales from solo freelancers to agency teams with dozens of active projects.
How do you create effective screenshot and video feedback?
Creating annotated screenshot feedback
- Capture the screen at full resolution using your OS shortcut (Cmd+Shift+4 on macOS, Win+Shift+S on Windows) or a browser extension that captures the full page.
- Upload the image to a pixel-anchored feedback tool.
- Click directly on the element you are commenting on and type a specific, actionable note. Reference the element by name ("the CTA button in the hero section") rather than by position ("the button on the right").
- Attach any relevant context: browser version, viewport size, or the specific user flow that led to the issue.
- Name the file clearly:
project-name_screen-name_v2_YYYYMMDD. Store it in a shared folder organized by project and version.
Pro Tip: Use a consistent naming convention from day one. Files named "screenshot_final_FINAL2.png" are unfindable three weeks later. A format like projectname_pagename_v3_20260415 takes five seconds to create and saves hours of searching.
Creating effective short video feedback
A useful narrated screen recording follows a simple three-part script:
- Orient: Name the file, the screen, and what you are about to show. ("This is feedback on the checkout flow, specifically the payment step.")
- Demonstrate: Show the interaction or issue in real time. Narrate what you are doing and why it matters.
- Summarize: State the one or two actions you want the receiver to take. End the recording there.
Step-by-step:
- Set your microphone input and test audio before recording. A clear voice track is non-negotiable.
- Set screen resolution to 1080p or your standard display resolution. Avoid recording at 4K unless the detail requires it.
- Record in 60–180 seconds. If you need more time, split into two clips.
- Add captions using a tool like Otter.ai, Rev, or your platform's built-in captioning (Canvas SpeedGrader, for example, supports this natively).
- Export as MP4 and upload to your LMS, project management tool, or shared drive. Include a short written summary in the same thread.
- Name and store the file using the same convention as screenshots:
project-name_topic_v1_YYYYMMDD.mp4.
Structured video capture tools that generate key frames, interaction timelines, and transcripts automatically make video feedback significantly more actionable, especially for developer handoffs and AI-assisted debugging.
Accessibility, privacy, and consent: what you need to check
The single most important compliance action is this: get explicit consent before recording anyone's screen, voice, or work, and add captions or transcripts to every video you share.
Checklist:
- Captions and transcripts. Every video must have synchronized captions. Auto-generated captions (from tools like Otter.ai or Rev) need a human review pass before sharing. UDL guidelines from CAST require multiple means of representation, which means captions are not optional for accessible feedback.
- Alt text for screenshots. Any screenshot shared in an LMS or document needs descriptive alt text so screen readers can convey the content.
- Informed consent for recordings. If you record a student's work, a client's screen, or a team member's session, they need to know before you start. A one-line disclosure at the start of a project or course is the minimum.
- FERPA considerations. In US educational settings, video feedback that includes identifiable student work is subject to FERPA. Store recordings in a FERPA-compliant system (your institution's LMS, not a personal Google Drive folder) and set retention limits.
- Minimal personal data. Redact names, emails, or sensitive information visible on screen before sharing a recording externally.
- File format and storage. Use widely supported formats (MP4 for video, PNG or JPEG for screenshots). Set a retention policy: delete recordings after the review cycle closes unless there is a documented reason to keep them.
- Secure capture contexts. Browser-based screen capture requires HTTPS and explicit user permission per MDN's display-capture documentation. Confirm your tool operates in a secure context before deploying it to students or clients.
Pro Tip: Add a one-sentence consent disclosure to your course syllabus or project kickoff document: "Feedback on your work may be delivered as a short screen recording. Recordings are stored in [platform] and deleted after [timeframe]." That single sentence covers most consent requirements and sets expectations early.
How do you build a scalable workflow combining both formats?
Pattern 1: Screenshot-first with video escalation
This is the right default for most design and QA teams. Every piece of feedback starts as a screenshot with a pinned comment. If a reviewer cannot describe the issue clearly in two sentences, they escalate to a 60–90 second recording. The screenshot stays in the thread as the anchor; the video adds context.
Triage triggers for escalating to video:
- The issue involves animation, timing, or a state change that only appears in motion.
- The feedback requires walking through a multi-step user flow to reproduce.
- The tone of the feedback matters as much as the content (sensitive design critique, complex rubric explanation).
Pattern 2: Video-first for onboarding, screenshots for revisions
Use a short video to introduce a new client or student to a project, a workflow, or a set of expectations. Then switch to screenshot-based feedback for all subsequent rounds. This gives you the warmth and context of video at the start, and the precision and speed of screenshots for the iterative work that follows. Strategies for improving user engagement consistently show that a strong initial orientation reduces back-and-forth later.
Scalability tips
- Batch recordings. If you are giving similar feedback to multiple students or team members, record one video that addresses the common issue and share it with the group. Reserve individual recordings for unique or sensitive feedback.
- Guest reviewer flows. Tools that allow reviewers to comment without creating an account remove a major friction point in client and stakeholder review cycles.
- Auto-summaries. AI-generated comment summaries turn a thread of 15 pinned annotations into a one-page action list, which is far easier to hand off to a developer or student.
- Version control. Keep every version of a design or document alongside its feedback thread. Reviewers should be able to compare v1 and v2 without hunting through email.
What does the research say about video vs screenshot feedback?
Evidence shows video increases personalization and some engagement metrics, while screenshots win for referenceability, maintainability, and scalability. Neither format dominates across all dimensions.
Key findings from the research:
- A Frontiers in Education study using 77 course evaluations found multimodal video feedback reduced translation problems and improved perceived usefulness compared to written-only feedback.
- A meta-analysis published in Educational Psychology Review found video feedback interventions were effective for improving interaction skills and professional behaviors, particularly when combined with structured observation forms.
- JITP / CUNY practitioner research found screencasts valuable for feedback but most effective when paired with rubrics or structured prompts that focus learner attention.
- ScreenGuide's documentation analysis found teams update screenshot-based guides 5–7x more frequently than video equivalents, pointing to a clear maintainability advantage for screenshots in living documentation.
- Canvas's 2025 addition of screen capture to SpeedGrader reflects growing platform recognition that short video feedback increases student engagement and the likelihood of acting on comments.
What these findings mean for practice:
- Video feedback works best when it is short, narrated, and paired with explicit goals or a rubric. Without structure, learners often watch without knowing what to do next.
- Screenshots are the better choice for any feedback that needs to be referenced, updated, or searched after the initial review.
- Combining both formats is not a compromise. It is the approach practitioners and platforms are converging on.
A practitioner perspective on mixed feedback workflows
The most common mistake teams make is treating this as an either/or decision. Screenshot or video. Pick one and stick with it. That framing misses the point entirely.
The teams that get the most out of mixed feedback workflows are the ones that set a clear default and define explicit escalation rules. Screenshot is the default. Video is the exception, triggered by specific conditions: motion, process, or personalization. When those rules are written down and shared with the whole team, reviewers stop second-guessing themselves and feedback quality goes up.
A common rollout pattern: start with screenshots only for the first two weeks. This forces reviewers to be specific and precise. Then introduce short video for the scenarios where reviewers consistently struggle to describe something in text. By the time video enters the workflow, everyone already knows how to write a good screenshot comment, so the video adds context rather than replacing rigor.
The most persistent barrier is time. Reviewers feel that recording a video takes too long. The fix is a strict time cap: 90 seconds maximum, no exceptions. A 90-second recording with a clear three-part script (orient, demonstrate, summarize) takes about 3 minutes to produce. That is a reasonable ask. A 5-minute rambling walkthrough is not, and it is the main reason video feedback gets abandoned after the first sprint.
Usepinhub brings pixel-anchored feedback and video integration together
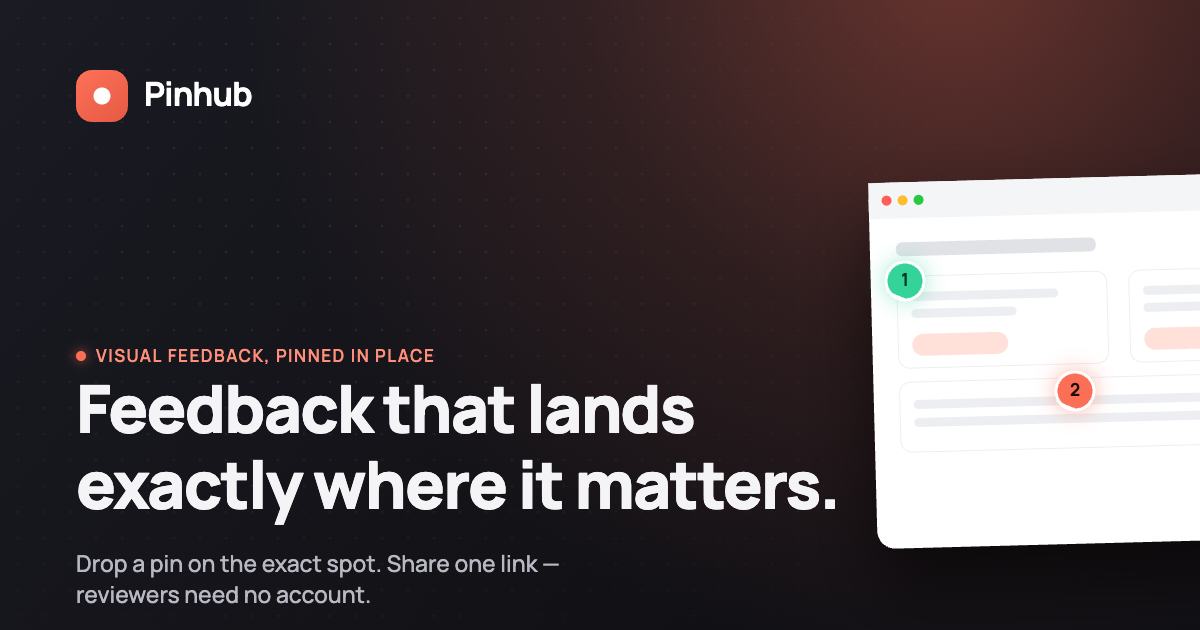
Pixel-anchored screenshot feedback is the core of what Usepinhub is built around. You upload a screenshot or Figma design, click directly on any element, and pin a comment at that exact location. Reviewers, including clients and stakeholders, can respond without creating an account, which removes the single biggest friction point in most external review cycles.
Key features that match the workflows described in this article:
- Pixel-anchored comments tied to exact screen coordinates, so feedback is never ambiguous.
- Guest reviewer access with no account required, useful for client reviews and student peer feedback.
- Version control that keeps every iteration alongside its feedback thread for easy comparison.
- AI-generated summaries that convert a thread of annotations into a prioritized action list.
- Password-protected sharing for sensitive designs or student work.
For teams that also use short video feedback, Usepinhub's screenshot-first structure gives you the organized, searchable backbone that video alone cannot provide. You can attach a video link to any comment thread and keep the pixel anchor as the reference point. Start with the free plan to see how pixel-anchored feedback fits your current review workflow.
Sources
FAQ
What is the difference between screenshot and video feedback?
Screenshot feedback pins written comments to a specific point on a static image, giving precise, scannable, and easily updated notes. Video feedback uses a narrated screen recording to show motion, process, or tone that a static image cannot convey.
When should you use video feedback instead of a screenshot?
Use video when the issue involves animation, a multi-step interaction, or when the tone of the feedback matters as much as the content. For most static design or text reviews, a screenshot with a pinned comment is faster and more precise.
What is a video feedback loop?
A video feedback loop is a review cycle where a recording of a screen, interaction, or work product is shared with a reviewer, who responds with comments or a follow-up recording, creating an iterative exchange. In practice, the most effective loops combine short video clips with structured written notes or rubrics.
How do you give feedback on a video or screen recording?
Add a transcript or timestamped comment thread alongside the video so reviewers can reference specific moments. Tools that generate key frames and interaction logs, as described in Stash's structured capture analysis, make video feedback significantly easier to act on.
Can Usepinhub handle both screenshot and video feedback?
Usepinhub is built around pixel-anchored screenshot feedback, with features including pinned comments, guest reviewer access, version control, and AI summaries. Video links can be attached to any comment thread, keeping the screenshot anchor as the primary reference point.