
TL;DR:
- A fast, checklist-based onboarding process completed in five days or less significantly improves client retention. Every phase produces a concrete output before proceeding, with automated admin tasks supporting manual trust-building interactions. Clients who pin their first comment within a week are more likely to remain active at 90 days.
A compact, checklist-driven workflow, run through a single client-facing portal and completed in 5 days or fewer, is the fastest way to activate and retain clients on a visual feedback platform. Start here:
- Send the portal invite and welcome email within 60 minutes of contract signing
- Collect payment and signed agreement before scheduling anything else
- Deliver a named intake form (specific files requested, not broad categories)
- Schedule the kickoff call by day 3; hold it no later than day 5
- Run follow-up check-ins at days 7, 14, and 30 to confirm activation
Portico's onboarding guide confirms that each phase must produce one concrete output before the next phase begins. OnboardMap's 2026 analysis shows that top-performing teams complete onboarding in 5 days or fewer and retain 92%+ of clients at 90 days. Usepinhub is the recommended platform for running this workflow with pixel-anchored comments, guest reviewer links, and version control built in.
Table of Contents
- What does a complete client onboarding workflow look like?
- How do you build a step-by-step onboarding checklist for design feedback?
- Which parts of onboarding should you automate, and which should stay manual?
- How do you assign ownership and prevent handoff gaps?
- What metrics tell you whether onboarding is working?
- What are the most common onboarding failures for design feedback teams?
- How does Usepinhub map to this onboarding workflow?
- Key Takeaways
- What most teams get wrong about client onboarding
- Pinhub makes your first client impression count
- Useful sources
- FAQ
What does a complete client onboarding workflow look like?
Effective client onboarding follows five phases, each with a single required output that unlocks the next step.
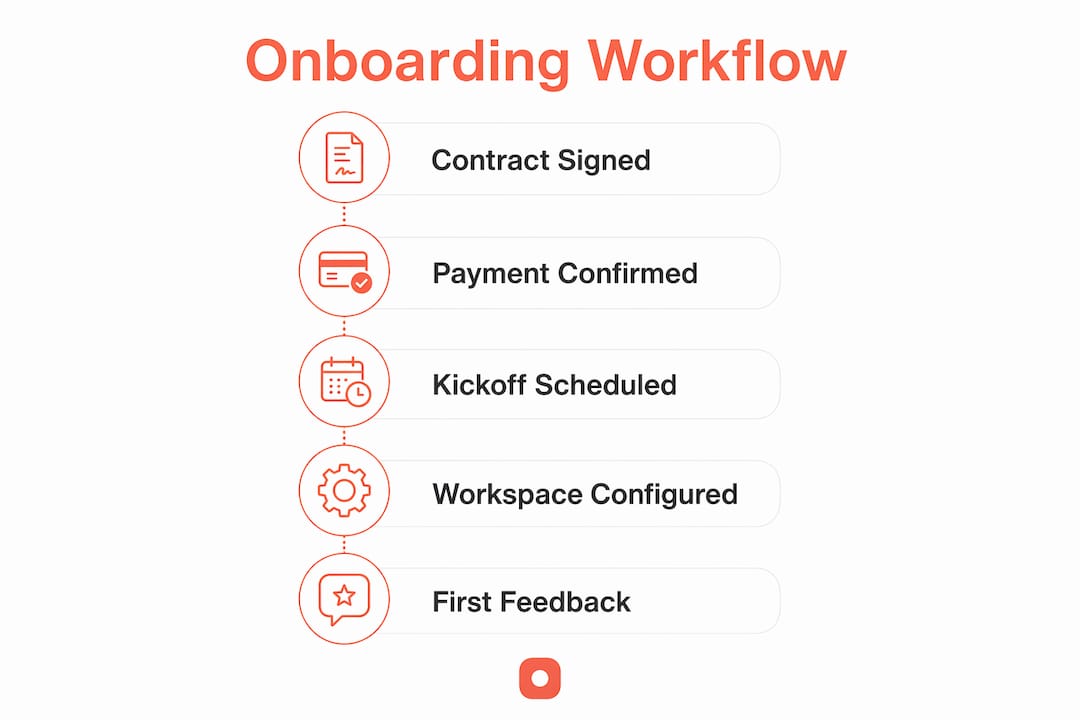
| Phase | Owner | Output | Target Timing |
|---|---|---|---|
| Pre-onboarding | Sales | Signed contract + payment on file | Day 0 |
| Welcome & workspace setup | CS/PM | Portal invite sent, workspace ready | Within 60 min of signing |
| Intake & information gathering | CS/PM | Completed intake form | Days 1–3 |
| Kickoff | CS/PM + Client | Agreed goals, scope, and communication cadence | Days 3–5 |
| Activation & follow-up | CS/PM | First comment pinned; 7/14/30 check-ins scheduled | Days 5–30 |
Speed matters more than most teams realize. Top performers who finish onboarding in 5 days retain 92%+ of clients at 90 days; firms with longer onboarding times see measurably higher drop rates. For a visual feedback platform, the "first value" moment is the client's first pinned comment on a real screenshot, not the kickoff call itself.
Retention signal: Clients who engage early by pinning their first comment within the first week are more likely to remain active at 90 days than those who do not engage until week two or later.
The Portico onboarding guide recommends scheduling the kickoff within days 3–5, with a 30–45 minute agenda focused on goals, scope, and stakeholders, not a product tour.
How do you build a step-by-step onboarding checklist for design feedback?
A repeatable, checklist-based workflow with named owners prevents the variability that causes missed steps. Here is the exact sequence for a visual feedback platform:
- Sales sends the portal invite (Day 0): Share the Usepinhub workspace link immediately after contract signing. Include the guest reviewer link so the client can access without creating an account.
- CS sends the welcome email (within 60 minutes): Introduce the onboarding contact, confirm the kickoff date, and attach the intake form link.
- Deliver a named intake form (Day 1): Request specific files by name, for example "brand-assets/logo.ai" and "homepage-screenshot-v1.png," not broad categories like "brand materials."
- Set up the workspace (Days 1–2): Create the folder structure (project name → version folders), upload screenshot placeholders, and enable version control.
- Invite guest reviewers (Day 2): Send magic links to each reviewer. No account creation required on their end.
- Hold the kickoff call (Days 3–5): Cover goals, deliverables, communication preferences, and the first milestone. Confirm who pins comments and who resolves threads.
- Verify first activity (Day 7): Check that the client has pinned at least one comment. If not, trigger a follow-up immediately.
- Run 7/14/30 check-ins: Review resolved threads, confirm version history is being used, and address any friction points.
Pro Tip: Keep intake forms to ten questions or fewer. Asking for "all brand assets" causes abandonment; asking for "logo.ai, brand-colors.pdf, and one live URL" gets a response the same day.
Welcome email template:
Subject: Your [Project Name] workspace is ready
Hi [Client Name], your Usepinhub workspace is set up and ready. Here is your access link: [portal link]. Please complete the intake form by [date]: [form link]. Our kickoff call is scheduled for [date/time]. Reply here with any questions before then.
Kickoff agenda (30 minutes):
- Goals and success metrics (10 min)
- Scope, deliverables, and first milestone (10 min)
- Communication preferences and response SLAs (5 min)
- Live walkthrough: pinning a comment on a screenshot (5 min)
Which parts of onboarding should you automate, and which should stay manual?
Templates and automation reduce variability and free your team for the moments that actually build trust. The rule is straightforward: automate admin, keep human moments human.
Automate these:
- Portal invite and welcome email (fires within 5 minutes of contract signing)
- Named document reminders at days 1, 3, and 5 if intake is incomplete
- Payment confirmation trigger that unlocks workspace setup
- Status nudges at days 3, 7, and 10 for non-responders
- Kickoff reminder 24 hours before the call
- Post-kickoff recap email with resolved thread summary
Keep these manual:
- The welcome call (trust is built person-to-person, not by a sequence)
- Complex Q&A about scope or deliverables
- The internal handoff meeting between sales and CS
For automation sequence design, a simple logic chain works well: intake form submitted → trigger kickoff scheduling link → if not booked within 3 days → escalate to onboarding owner.
Pro Tip: Cap automated reminders at three per phase. More than that trains clients to ignore them. If three nudges produce no response, a human call is faster than a fourth email.

How do you assign ownership and prevent handoff gaps?
Onboarding failures most often occur at handoffs between tools and between teams, not during execution. Clear role design closes those gaps before they open.
Core roles:
- Sales handoff owner: Delivers the signed contract, payment confirmation, and a completed account brief to CS before day 0 ends.
- Onboarding owner (CS/PM): Responsible for every client-facing step from welcome email through the 30-day check-in.
- Technical setup: Configures the workspace, folder structure, and version control settings.
- Client primary contact: Named in the intake form; the single person who approves resolved threads.
SLA minimums:
- Contract confirmation sent within 4 hours of signing
- Intake form delivered within 60 minutes of workspace setup
- Kickoff scheduled within 48 hours of intake form receipt
- Internal handoff brief completed before the kickoff call
No-blind-handoff checklist:
- Account brief completed and shared with CS
- All named documents verified as received
- Kickoff date confirmed in writing with the client
- Workspace and guest reviewer links tested
Standardizing these steps with reusable templates lets teams scale onboarding volume without adding headcount or sacrificing SLA targets.
What metrics tell you whether onboarding is working?
| Metric | Definition | Target | Owner |
|---|---|---|---|
| Time to portal accept | Minutes from invite sent to client opening the link | Under 24 hours | CS |
| Time to first comment | Days from signing to first pinned comment | Under 7 days | CS/PM |
| Intake completion rate | % of intake forms fully submitted by day 3 | 92%+ | CS |
| 30-day retention | % of clients still active at day 30 | 90%+ | CS Lead |
| 90-day retention | % of clients still active at day 90 | 92%+ | CS Lead |
Track time-to-first-comment above all others. It is the clearest leading indicator of 90-day retention for a visual feedback platform. Clients who pin a comment within 7 days are actively using the product; those who do not are at risk regardless of how smooth the kickoff felt.
Collect this data from the Usepinhub workspace dashboard. For teams without a dedicated CRM, a shared spreadsheet with one row per client and columns for each metric date works as a reliable fallback.
What are the most common onboarding failures for design feedback teams?
- No named owner for comment threads: Feedback piles up with no one responsible for resolving it. Fix: assign one internal reviewer and one client contact at kickoff; use resolved threads as the official completion checklist.
- Intake overload: Asking for every asset at once causes abandonment. Fix: request three to five specific named files first; add a second request only after those arrive.
- Too many reviewers: More than four reviewers on a single screenshot produces conflicting, unresolvable feedback. Fix: cap guest reviewer invites at four per project and name a single approver.
- Multi-tool friction: Clients forced into internal PM tools they do not use will disengage. Fix: give every client a single magic link to the Usepinhub portal; no login, no new account.
- Vague comment threads: "Fix the header" with no pixel anchor wastes revision cycles. Fix: train clients during the kickoff walkthrough to pin comments directly on the relevant area of the screenshot.
Pro Tip: Enforce a "single-source" policy from day one. Every piece of feedback, every file, and every approval lives in the Usepinhub portal. When a client sends feedback by email, reply with the portal link and ask them to pin it there. One redirect is usually enough to establish the habit.
How does Usepinhub map to this onboarding workflow?
Usepinhub's feature set aligns directly with the mandatory workflow requirements. Here is the setup checklist to run before inviting your first client:
- Create the workspace: Name it after the client or project. Set up top-level folders by deliverable type (e.g., "Homepage," "Mobile," "Brand Assets").
- Upload screenshot placeholders: Add at least one starter screenshot so the client has something to comment on immediately after joining.
- Enable version control: Turn on version tracking so every uploaded revision is logged and comparable.
- Generate the guest reviewer link: Create a magic link for each external reviewer. No account creation required on the client's side.
- Set a password on the shared link: For sensitive projects, password-protect the review link before sending it. Use this for any client whose assets are not yet public.
- Enable AI summary emails: Turn on automated summary emails so clients receive a digest of all open and resolved comments after each review session.
- Test the full flow: Pin a test comment, resolve it, and confirm the summary email arrives before inviting the client.
Pro Tip: Password-protect every external review link by default, not just for sensitive projects. It takes ten seconds to set and signals to clients that their work is handled carefully from day one.
The pixel-anchored comment system means feedback is always tied to a specific location on the screenshot, eliminating the "fix the thing on the left" ambiguity that costs revision cycles. Resolved threads double as a completion checklist, so you always know exactly where each project stands.
Key Takeaways
A checklist-driven onboarding workflow completed in 5 days or fewer, run through a single client portal with named owners at every phase, is the most reliable way to activate clients and protect 90-day retention.
| Point | Details |
|---|---|
| Finish in 5 days | Top performers who complete onboarding in 5 days retain 92%+ of clients at 90 days. |
| One output per phase | Each phase must produce a concrete deliverable before the next phase begins. |
| Run 7/14/30 follow-ups | Schedule check-ins at days 7, 14, and 30 to catch disengagement before it becomes churn. |
| Automate admin, not trust | Automate reminders and status nudges; keep welcome calls and complex Q&A manual. |
| Usepinhub setup | Run the 7-step Pinhub setup checklist (workspace, folders, guest links, version control, AI summaries) before inviting any client. |
What most teams get wrong about client onboarding
The biggest mistake is treating onboarding as a product tour. Clients do not need a feature walkthrough in the first week; they need to feel that their project is in capable hands. The single process change that moves the needle most is collecting payment and completing the internal account brief before sending the welcome email. When those two things are done first, every subsequent step runs faster because there is no ambiguity about scope or ownership.
Most teams also underestimate how much the intake form design affects speed. A form that asks for "all relevant brand assets" will sit incomplete for days. A form that asks for "logo.ai, brand-colors.pdf, and the live URL you want us to screenshot" gets a response the same afternoon. Specificity is the shortcut.
Pro Tip: Always collect payment before chasing low-priority documents. A paid client completes intake; an unpaid one deprioritizes it. Sequence matters.
Pinhub makes your first client impression count
Clients judge your process in the first 48 hours. Usepinhub gives design teams and account managers a purpose-built workspace where clients can review screenshots, pin pixel-precise comments, and approve deliverables without creating an account. Guest reviewer magic links, version control, AI-generated comment summaries, and password-protected sharing are all included.
The free plan covers solo and low-volume use. Pro and Team plans add unlimited screenshots, Figma integration, and full version history. Every plan comes with the same guest reviewer access, so your clients never hit a login wall.
Download the free onboarding template that matches the checklist in this article, then start your Usepinhub workspace and run your first client through the full workflow today.
Useful sources
- Portico: Client Onboarding Complete Guide — Covers phase sequencing, the one-output-per-phase rule, and kickoff timing recommendations.
- OnboardMap: The Complete Guide to Client Onboarding 2026 — Source for the 5-day / 92% retention benchmark and portal vs. email thread analysis.
- Moxo: New Client Onboarding Process — Practical checklist-based workflow and named-owner framework.
- Assembly: Client Onboarding Process Flow — Seven-step process flow with automation and scaling best practices.
- Rocketlane: Client Onboarding Best Practices 2026 — Templates, checklists, and the case for treating onboarding as a formal operating system.
- Usepinhub: Design Feedback & Review Tool — Platform reference for pixel-anchored comments, guest reviewer links, version control, and AI summaries.
- Pinhub Blog: Onboarding Clients Complete 2026 Guide — Expanded templates and step-by-step processes for minimizing onboarding variability.
FAQ
How long should client onboarding take?
Top-performing teams complete onboarding in 5 days or fewer and retain 92%+ of clients at 90 days, according to OnboardMap's 2026 analysis. For most visual feedback projects, 5 days or fewer is the target.
How do you onboard clients to a visual feedback platform without requiring them to create an account?
Use a magic-link guest reviewer invite, which Usepinhub supports natively. Clients click the link, land directly in the workspace, and can pin comments on screenshots immediately with no sign-up required.
What is the most important metric to track during client onboarding?
Time to first comment is the strongest leading indicator of 90-day retention for a visual feedback platform. Clients who pin their first comment within 7 days of signing are significantly more likely to stay active.
What should a client onboarding checklist include?
At minimum: signed contract, payment on file, welcome email sent, named intake form delivered, workspace configured, guest reviewer links sent, kickoff call held, and first activity verified by day 7.
When should you automate versus keep onboarding steps manual?
Automate portal invites, document reminders, payment confirmations, and status nudges. Keep the welcome call, complex scope questions, and the internal handoff meeting manual — those are the moments where trust is actually built.